准备环境 pom.xml依赖 用户信息存储在MySQL中,dao层使用Spring Data JPA,因此需要引入相关的依赖
1
2
3
4
5
6
7
8
9
10
11
12
13
14
15
16
17
18
19
20
21
22
23
24
25
26
27
28
29
30
31
32
33
34
35
36
37
38
39
40
41
42
43
44
45
46
47
48
49
50
51
52
53
54
55
56
57
58
59
60
61
62
63
64
65
66
<?xml version="1.0" encoding="UTF-8" ?> <project xmlns ="http://maven.apache.org/POM/4.0.0" xmlns:xsi ="http://www.w3.org/2001/XMLSchema-instance" xsi:schemaLocation ="http://maven.apache.org/POM/4.0.0 https://maven.apache.org/xsd/maven-4.0.0.xsd" > <modelVersion > 4.0.0</modelVersion > <parent > <groupId > org.springframework.boot</groupId > <artifactId > spring-boot-starter-parent</artifactId > <version > 2.7.4</version > <relativePath /> </parent > <groupId > com.monochrome</groupId > <artifactId > shiro-springboot</artifactId > <version > 0.0.1-SNAPSHOT</version > <name > shiro-springboot</name > <description > shiro-springboot</description > <properties > <java.version > 11</java.version > </properties > <dependencies > <dependency > <groupId > org.springframework.boot</groupId > <artifactId > spring-boot-starter-data-jpa</artifactId > </dependency > <dependency > <groupId > org.springframework.boot</groupId > <artifactId > spring-boot-starter-web</artifactId > </dependency > <dependency > <groupId > mysql</groupId > <artifactId > mysql-connector-java</artifactId > <scope > runtime</scope > </dependency > <dependency > <groupId > org.apache.shiro</groupId > <artifactId > shiro-spring-boot-web-starter</artifactId > <version > 1.9.1</version > </dependency > <dependency > <groupId > org.projectlombok</groupId > <artifactId > lombok</artifactId > </dependency > <dependency > <groupId > org.springframework.boot</groupId > <artifactId > spring-boot-devtools</artifactId > <scope > runtime</scope > <optional > true</optional > </dependency > <dependency > <groupId > org.springframework.boot</groupId > <artifactId > spring-boot-starter-test</artifactId > <scope > test</scope > </dependency > </dependencies > <build > <plugins > <plugin > <groupId > org.springframework.boot</groupId > <artifactId > spring-boot-maven-plugin</artifactId > </plugin > </plugins > </build > </project >
application.yml配置文件 1 2 3 4 5 6 7 8 9 10 11 12 spring: datasource: type: com.zaxxer.hikari.HikariDataSource driver-class-name: com.mysql.cj.jdbc.Driver url: jdbc:mysql://localhost:3306/shirodb?characterEncoding=utf-8&useSSL=false username: username password: password jackson: date-format: yyyy-MM-dd HH:mm:ss time-zone: GMT+8 shiro: loginUrl: /user/login
数据库表信息 1 2 3 4 5 6 7 8 9 10 11 12 13 14 15 16 17 18 19 CREATE DATABASE IF NOT EXISTS `shirodb` CHARACTER SET utf8mb4;USE `shirodb`; CREATE TABLE `user `( `id` BIGINT (20 ) NOT NULL AUTO_INCREMENT COMMENT '编号' , `name` VARCHAR (30 ) DEFAULT NULL COMMENT '用户名' , `pwd` VARCHAR (50 ) DEFAULT NULL COMMENT '密码' , `rid` BIGINT (20 ) DEFAULT NULL COMMENT '角色编号' , PRIMARY KEY (`id`) ) ENGINE = INNODB AUTO_INCREMENT = 1 DEFAULT CHARSET = utf8 COMMENT = '用户表' ; INSERT INTO shirodb.user (name, pwd, rid) VALUES ('zhangsan' , '7174f64b13022acd3c56e2781e098a5f' , null );INSERT INTO shirodb.user (name, pwd, rid) VALUES ('lisi' , '7174f64b13022acd3c56e2781e098a5f' , null );create user shiro identified by 'shiro' ; grant all on shirodb.* to shiro;
登录认证实现 后端接口服务实现 创建实体 项目使用了Lombok,因此不需要写getter和settier,@Entity注解标志数据库表名,@Id标志主键,@GeneratedValue(strategy = GenerationType.IDENTITY)标志主键自增
1 2 3 4 5 6 7 8 9 10 11 12 13 14 15 16 17 18 19 20 21 22 23 24 25 26 27 28 29 30 31 32 33 34 35 36 37 38 39 40 41 42 43 package com.monochrome.shiro.entity;import lombok.*;import org.hibernate.Hibernate;import javax.persistence.Entity;import javax.persistence.GeneratedValue;import javax.persistence.GenerationType;import javax.persistence.Id;import java.util.Objects;@Getter @Setter @ToString @RequiredArgsConstructor @AllArgsConstructor @Entity(name = "user") public class User { @Id @GeneratedValue(strategy = GenerationType.IDENTITY) private Integer id; private String name; private String pwd; private Integer rid; @Override public boolean equals (Object o) { if (this == o) return true ; if (o == null || Hibernate.getClass(this ) != Hibernate.getClass(o)) return false ; User user = (User) o; return id != null && Objects.equals(id, user.id); } @Override public int hashCode () { return getClass().hashCode(); } }
创建repository 1 2 3 4 @Repository public interface UserRepository extends JpaRepository <User, Integer> { User findUserByName (String name) ; }
创建 service 接口 1 2 3 public interface UserService { User getUserByName (String name) ; }
实现类 1 2 3 4 5 6 7 8 9 10 11 12 13 14 @Service public class UserServiceImpl implements UserService { private final UserRepository userRepository; public UserServiceImpl (UserRepository userRepository) { this .userRepository = userRepository; } @Override public User getUserByName (String name) { return userRepository.findUserByName(name); } }
自定义realm 1 2 3 4 5 6 7 8 9 10 11 12 13 14 15 16 17 18 19 20 21 22 23 24 25 26 27 28 29 30 31 32 33 34 35 36 37 38 39 40 41 42 43 44 45 46 47 48 49 50 51 52 package com.monochrome.shiro.realm;import com.monochrome.shiro.entity.User;import com.monochrome.shiro.service.UserService;import org.apache.shiro.authc.AuthenticationException;import org.apache.shiro.authc.AuthenticationInfo;import org.apache.shiro.authc.AuthenticationToken;import org.apache.shiro.authc.SimpleAuthenticationInfo;import org.apache.shiro.authz.AuthorizationInfo;import org.apache.shiro.realm.AuthorizingRealm;import org.apache.shiro.subject.PrincipalCollection;import org.apache.shiro.util.ByteSource;import org.springframework.stereotype.Component;@Component public class CustomRealm extends AuthorizingRealm { private final UserService userService; public CustomRealm (UserService userService) { this .userService = userService; } @Override protected AuthorizationInfo doGetAuthorizationInfo (PrincipalCollection principals) { return null ; } @Override protected AuthenticationInfo doGetAuthenticationInfo (AuthenticationToken token) throws AuthenticationException { String name = token.getPrincipal().toString(); User user = userService.getUserByName(name); if (user != null ) { SimpleAuthenticationInfo info = new SimpleAuthenticationInfo ( token.getPrincipal(), user.getPwd(), ByteSource.Util.bytes("salt" ), name ); return info; } return null ; } }
Shiro配置类 1 2 3 4 5 6 7 8 9 10 11 12 13 14 15 16 17 18 19 20 21 22 23 24 25 26 27 28 29 30 31 32 33 34 35 36 37 38 39 40 41 42 43 44 45 46 47 48 49 50 51 52 53 54 package com.monochrome.shiro.config;import com.monochrome.shiro.realm.CustomRealm;import org.apache.shiro.authc.credential.HashedCredentialsMatcher;import org.apache.shiro.spring.web.config.DefaultShiroFilterChainDefinition;import org.apache.shiro.web.mgt.DefaultWebSecurityManager;import org.springframework.context.annotation.Bean;import org.springframework.context.annotation.Configuration;@Configuration public class ShiroConfig { private final CustomRealm realm; public ShiroConfig (CustomRealm realm) { this .realm = realm; } @Bean public DefaultWebSecurityManager defaultWebSecurityManager () { DefaultWebSecurityManager defaultWebSecurityManager = new DefaultWebSecurityManager (); HashedCredentialsMatcher matcher = new HashedCredentialsMatcher (); matcher.setHashAlgorithmName("md5" ); matcher.setHashIterations(3 ); realm.setCredentialsMatcher(matcher); defaultWebSecurityManager.setRealm(realm); return defaultWebSecurityManager; } @Bean public DefaultShiroFilterChainDefinition shiroFilterChainDefinition () { DefaultShiroFilterChainDefinition definition = new DefaultShiroFilterChainDefinition (); definition.addPathDefinition("/user/login" , "anon" ); definition.addPathDefinition("/user/userLogin" , "anon" ); definition.addPathDefinition("/**" , "authc" ); return definition; } }
实现controller 1 2 3 4 5 6 7 8 9 10 11 12 13 14 15 16 17 18 19 20 21 22 23 24 25 26 27 28 29 30 31 32 33 34 35 36 37 38 package com.monochrome.shiro.controller;import org.apache.shiro.SecurityUtils;import org.apache.shiro.authc.AuthenticationException;import org.apache.shiro.authc.AuthenticationToken;import org.apache.shiro.authc.UsernamePasswordToken;import org.apache.shiro.subject.Subject;import org.springframework.stereotype.Controller;import org.springframework.web.bind.annotation.GetMapping;import org.springframework.web.bind.annotation.RequestMapping;import org.springframework.web.bind.annotation.ResponseBody;@Controller @RequestMapping("user") public class UserController { @GetMapping("login") @ResponseBody public String login (String name, String pwd) { try { Subject subject = SecurityUtils.getSubject(); AuthenticationToken token = new UsernamePasswordToken (name, pwd); subject.login(token); return "登录成功" ; } catch (AuthenticationException e) { e.printStackTrace(); System.out.println("登录失败" ); return "登录失败" ; } } }
测试 启动项目,访问http://localhost:8080/user/login?name=zhangsan&pwd=z3
实现前端页面 前端采用Thymeleaf实现
添加依赖 1 2 3 4 <dependency > <groupId > org.springframework.boot</groupId > <artifactId > spring-boot-starter-thymeleaf</artifactId > </dependency >
添加 login 页面 注意一下,thymeleaf文件需要放在 resources/templates 文件下面
1 2 3 4 5 6 7 8 9 10 11 12 13 14 15 16 <!DOCTYPE html > <html lang ="en" > <head > <meta charset ="UTF-8" > <title > Shiro 登录认证</title > </head > <body > <h1 > Shiro 登录认证</h1 > <br > <form action ="/user/userLogin" > <div > 用户名:<input type ="text" name ="name" value ="" /> </div > <div > 密码:<input type ="password" name ="pwd" value ="" /> </div > <div > <input type ="submit" value ="登录" > </div > </form > </body > </html >
添加 main 页面 1 2 3 4 5 6 7 8 9 10 11 12 <!DOCTYPE html > <html lang ="en" > <head > <meta charset ="UTF-8" > <title > Shiro 登录认证后主页面</title > </head > <body > <h1 > Shiro 登录认证后主页面</h1 > <br > 登录用户为:<span th:text ="${session.user}" > </span > </body > </html >
添加 controller 方法,改造认证方法 1 2 3 4 5 6 7 8 9 10 11 12 13 14 15 16 17 18 19 20 21 22 23 24 25 26 27 28 29 30 31 32 33 34 35 36 37 38 39 40 41 42 43 44 45 46 package com.monochrome.shiro.controller;import org.apache.shiro.SecurityUtils;import org.apache.shiro.authc.AuthenticationException;import org.apache.shiro.authc.AuthenticationToken;import org.apache.shiro.authc.UsernamePasswordToken;import org.apache.shiro.subject.Subject;import org.springframework.stereotype.Controller;import org.springframework.web.bind.annotation.GetMapping;import org.springframework.web.bind.annotation.RequestMapping;import org.springframework.web.bind.annotation.ResponseBody;import javax.servlet.http.HttpSession;@Controller @RequestMapping("user") public class UserController { @GetMapping("userLogin") @ResponseBody public String userLogin (String name, String pwd, HttpSession session) { try { Subject subject = SecurityUtils.getSubject(); AuthenticationToken token = new UsernamePasswordToken (name, pwd); subject.login(token); session.setAttribute("user" ,token.getPrincipal().toString()); return "main" ; } catch (AuthenticationException e) { e.printStackTrace(); return "登录失败" ; } } @GetMapping("login") public String login () { return "login" ; } }
shiro相关配置 application.yml
1 2 shiro: loginUrl: /user/login
ShiroConfig
1 2 3 4 5 definition.addPathDefinition("/user/login" , "anon" ); definition.addPathDefinition("/user/userLogin" , "anon" ); definition.addPathDefinition("/**" , "authc" );
测试 启动项目,访问登录页面:http://localhost:8080/user/login,输入用户名和密码后跳转到主页面
多个 realm 的认证策略设置 当应用程序配置多个 Realm 时,例如:用户名密码校验、手机号验证码校验等等。 Shiro 的 ModularRealmAuthenticator 会使用内部的 AuthenticationStrategy 组件判断认 证是成功还是失败。
AuthenticationStrategy 是一个无状态的组件,它在身份验证尝试中被询问 4 次(这 4 次交互所需的任何必要的状态将被作为方法参数):
在所有 Realm 被调用之前
在调用 Realm 的 getAuthenticationInfo 方法之前
在调用 Realm 的 getAuthenticationInfo 方法之后
在所有 Realm 被调用之后
认证策略的另外一项工作就是聚合所有 Realm 的结果信息封装至一个 AuthenticationInfo 实例中,并将此信息返回,以此作为 Subject 的身份信息。
Shiro 中定义了 3 种认证策略的实现:
AuthenticationStrategy class 描述
AtLeastOneSuccessfulStrategy
只要有一个(或更多)的 Realm 验证成功,那么认证将视为成功
FirstSuccessfulStrategy
第一个 Realm 验证成功,整体认证将视为成功,且后续 Realm 将被忽略
AllSuccessfulStrategy
所有 Realm 成功,认证才视为成功
ModularRealmAuthenticator 内置的认证策略默认实现是 AtLeastOneSuccessfulStrategy 方式。可以通过配置修改策略
1 2 3 4 5 6 7 8 9 10 11 12 13 14 15 16 17 18 19 20 21 22 23 24 25 @Bean public DefaultWebSecurityManager defaultWebSecurityManager () { DefaultWebSecurityManager defaultWebSecurityManager = new DefaultWebSecurityManager (); ModularRealmAuthenticator modularRealmAuthenticator = new ModularRealmAuthenticator (); modularRealmAuthenticator.setAuthenticationStrategy(new AtLeastOneSuccessfulStrategy ()); defaultWebSecurityManager.setAuthenticator(modularRealmAuthenticator); List<Realm> realms = new ArrayList <>(); HashedCredentialsMatcher matcher = new HashedCredentialsMatcher (); matcher.setHashAlgorithmName("md5" ); matcher.setHashIterations(3 ); realm.setCredentialsMatcher(matcher); realms.add(realm); defaultWebSecurityManager.setRealms(realms); return defaultWebSecurityManager; }
remember me 功能 基本流程
首先在登录页面选中RememberMe然后登录成功;如果是浏览器登录,一般会 把 RememberMe 的 Cookie 写到客户端并保存下来;
关闭浏览器再重新打开;会发现浏览器还是记住你的;
访问一般的网页服务器端,仍然知道你是谁,且能正常访问;
但是,如果我们访问电商平台时,如果要查看我的订单或进行支付时,此时还 是需要再进行身份认证的,以确保当前用户还是你。
代码实现 配置类 1 2 3 4 5 6 7 8 9 10 11 12 13 14 15 16 17 18 19 20 21 22 23 24 25 26 27 28 29 30 31 32 33 34 35 36 37 38 39 40 41 42 43 44 45 46 47 48 49 50 51 52 53 54 55 56 57 58 59 60 61 62 63 64 65 66 67 68 69 70 71 72 73 74 75 76 77 78 79 80 81 82 83 84 85 86 87 88 89 90 91 92 93 94 95 96 97 98 99 100 101 package com.monochrome.shiro.config;import com.monochrome.shiro.realm.CustomRealm;import org.apache.shiro.authc.credential.HashedCredentialsMatcher;import org.apache.shiro.authc.pam.AtLeastOneSuccessfulStrategy;import org.apache.shiro.authc.pam.ModularRealmAuthenticator;import org.apache.shiro.mgt.RememberMeManager;import org.apache.shiro.realm.Realm;import org.apache.shiro.spring.web.config.DefaultShiroFilterChainDefinition;import org.apache.shiro.web.mgt.CookieRememberMeManager;import org.apache.shiro.web.mgt.DefaultWebSecurityManager;import org.apache.shiro.web.servlet.Cookie;import org.apache.shiro.web.servlet.SimpleCookie;import org.springframework.context.annotation.Bean;import org.springframework.context.annotation.Configuration;import java.util.ArrayList;import java.util.List;@Configuration public class ShiroConfig { private final CustomRealm realm; public ShiroConfig (CustomRealm realm) { this .realm = realm; } @Bean public DefaultWebSecurityManager defaultWebSecurityManager () { DefaultWebSecurityManager defaultWebSecurityManager = new DefaultWebSecurityManager (); ModularRealmAuthenticator modularRealmAuthenticator = new ModularRealmAuthenticator (); modularRealmAuthenticator.setAuthenticationStrategy(new AtLeastOneSuccessfulStrategy ()); defaultWebSecurityManager.setAuthenticator(modularRealmAuthenticator); List<Realm> realms = new ArrayList <>(); HashedCredentialsMatcher matcher = new HashedCredentialsMatcher (); matcher.setHashAlgorithmName("md5" ); matcher.setHashIterations(3 ); realm.setCredentialsMatcher(matcher); realms.add(realm); defaultWebSecurityManager.setRealms(realms); defaultWebSecurityManager.setRememberMeManager(createRememberMeManager()); return defaultWebSecurityManager; } private RememberMeManager createRememberMeManager () { CookieRememberMeManager cookieRememberMeManager = new CookieRememberMeManager (); cookieRememberMeManager.setCookie(createRememberMeCookie()); cookieRememberMeManager.setCipherKey("1234567890987654" .getBytes()); return cookieRememberMeManager; } private Cookie createRememberMeCookie () { SimpleCookie cookie = new SimpleCookie ("rememberMe" ); cookie.setPath("/" ); cookie.setHttpOnly(true ); cookie.setMaxAge(30 * 24 * 60 * 60 ); return cookie; } @Bean public DefaultShiroFilterChainDefinition shiroFilterChainDefinition () { DefaultShiroFilterChainDefinition definition = new DefaultShiroFilterChainDefinition (); definition.addPathDefinition("/user/login" , "anon" ); definition.addPathDefinition("/user/userLogin" , "anon" ); definition.addPathDefinition("/**" , "authc" ); definition.addPathDefinition("/**" , "user" ); return definition; } }
修改 controller 1 2 3 4 5 6 7 8 9 10 11 12 13 14 15 16 17 18 19 20 21 22 @GetMapping("userLogin") public String userLogin (String name, String pwd, @RequestParam(defaultValue = "false") boolean rememberMe, HttpSession session) { try { Subject subject = SecurityUtils.getSubject(); AuthenticationToken token = new UsernamePasswordToken (name, pwd, rememberMe); subject.login(token); session.setAttribute("user" , token.getPrincipal().toString()); return "main" ; } catch (AuthenticationException e) { e.printStackTrace(); return "登录失败" ; } } @GetMapping("userLoginRm") public String userLogin (HttpSession session) { session.setAttribute("user" ,"rememberMe" ); return "main" ; }
改造页面 login.html 1 2 3 4 5 6 7 8 9 10 11 12 13 14 15 16 17 <!DOCTYPE html > <html lang ="en" > <head > <meta charset ="UTF-8" > <title > Shiro 登录认证</title > </head > <body > <h1 > Shiro 登录认证</h1 > <br > <form action ="/user/userLogin" > <div > 用户名:<input type ="text" name ="name" value ="" /> </div > <div > 密码:<input type ="password" name ="pwd" value ="" /> </div > <div > 记住我:<input type ="checkbox" name ="rememberMe" value ="true" > </div > <div > <input type ="submit" value ="登录" > </div > </form > </body > </html >
测试
通过地址访问 userLoginRm http://localhost:8080/user/userLoginRm
过滤器拦截跳回登录页面
输入用户名和密码并勾上RememberMe
重新访问 userLoginRm http://localhost:8080/user/userLoginRm,显示user为rememberMe
用户登录认证后登出 用户登录后,配套的有登出操作。直接通过Shiro过滤器即可实现登出
修改登录后的 main.html 1 2 3 4 5 6 7 <body > <h1 > Shiro 登录认证后主页面</h1 > <br > 登录用户为:<span th:text ="${session.user}" > </span > <br > <a href ="/logout" > 登出</a > </body >
修改配置类,添加 logout 过滤器 1 2 3 4 5 6 7 8 9 10 11 12 13 14 15 @Bean public DefaultShiroFilterChainDefinition shiroFilterChainDefinition () { DefaultShiroFilterChainDefinition definition = new DefaultShiroFilterChainDefinition (); definition.addPathDefinition("/user/login" , "anon" ); definition.addPathDefinition("/user/userLogin" , "anon" ); definition.addPathDefinition("/logout" , "logout" ); definition.addPathDefinition("/**" , "authc" ); definition.addPathDefinition("/**" , "user" ); return definition; }
授权、角色认证 授权 用户登录后,需要验证是否具有指定角色指定权限。Shiro也提供了方便的工具进行判断。
这个工具就是Realm的doGetAuthorizationInfo方法进行判断。触发权限判断的有两种方式
在页面中通过shiro:****属性判断
在接口服务中通过注解@Requires****进行判断
后端接口服务注解 通过给接口服务方法添加注解可以实现权限校验,可以加在控制器方法上,也可以加 在业务方法上,一般加在控制器方法上。
@RequiresAuthentication 验证用户是否登录,等同于方法subject.isAuthenticated()
@RequiresUser 验证用户是否被记忆: 登录认证成功subject.isAuthenticated()为true 登录后被记忆subject.isRemembered()为true
@RequiresGuest 验证是否是一个guest的请求,是否是游客的请求
此时subject.getPrincipal()为null
@RequiresRoles 验证subject是否有相应角色,有角色访问方法,没有则会抛出异常 AuthorizationException。
例如:
1 2 @RequiresRoles(“aRoleName”) void someMethod () ;
只有subject有aRoleName角色才能访问方法someMethod()
@RequiresPermissions 验证subject是否有相应权限,有权限访问方法,没有则会抛出异常 AuthorizationException。
例如:
1 2 @RequiresPermissions (“file:read”,”wite:aFile.txt”)void someMethod () ;
subject必须同时含有file:read和wite:aFile.txt权限才能访问方法someMethod()
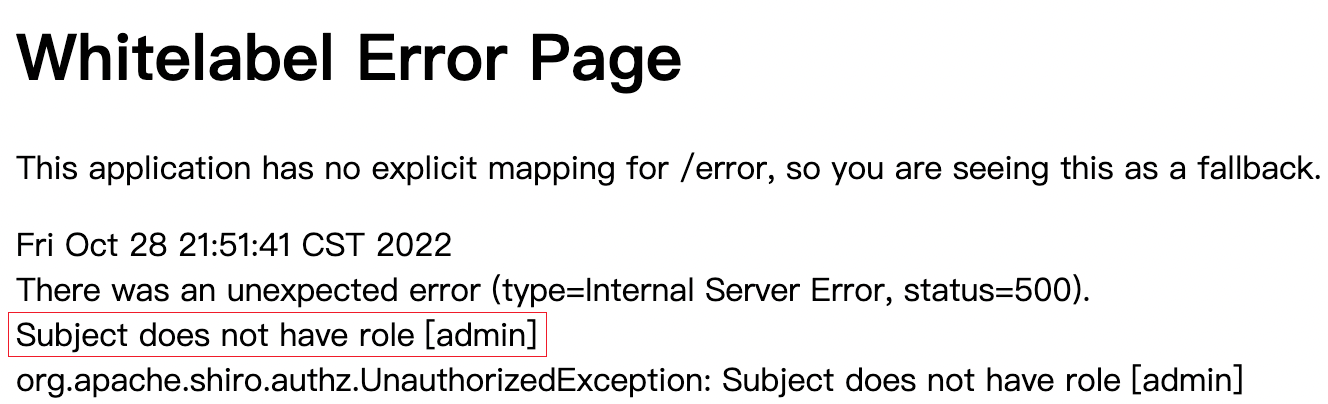
授权验证-没有角色无法访问 添加 controller 方法,并添加验证角色注解 1 2 3 4 5 6 7 8 @RequiresRoles("admin") @GetMapping("userLoginRoles") @ResponseBody public String userLoginRoles () { System.out.println("登录认证验证角色" ); return "验证角色成功" ; }
修改 main.html 1 2 3 4 5 6 7 8 9 <body > <h1 > Shiro 登录认证后主页面</h1 > <br > 登录用户为:<span th:text ="${session.user}" > </span > <br > <a href ="/logout" > 登出</a > <br > <a href ="/myController/userLoginRoles" > 测试授权</a > </body >
修改 CustomRealm 方法 1 2 3 4 5 6 @Override protected AuthorizationInfo doGetAuthorizationInfo (PrincipalCollection principals) { System.out.println("进入自定义授权方法" ); return null ; }
运行测试 http://localhost:8080/user/userLoginRoles
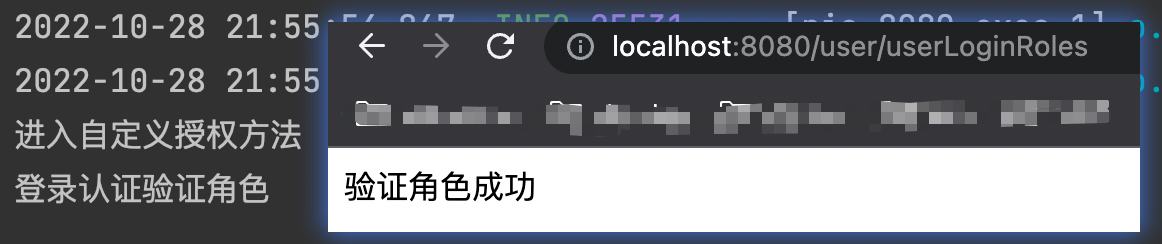
授权验证-获取角色进行验证 修改 CustomRealm 方法 1 2 3 4 5 6 7 8 9 10 @Override protected AuthorizationInfo doGetAuthorizationInfo (PrincipalCollection principals) { System.out.println("进入自定义授权方法" ); SimpleAuthorizationInfo info = new SimpleAuthorizationInfo (); info.addRole("admin" ); return info; }
运行测试 http://localhost:8080/user/userLoginRoles
新增角色信息以及角色用户映射表 1 2 3 4 5 6 7 8 9 10 11 12 13 14 15 16 17 18 19 20 21 22 23 24 25 26 27 CREATE TABLE `role`( `id` BIGINT (20 ) NOT NULL AUTO_INCREMENT COMMENT '编号' , `name` VARCHAR (30 ) DEFAULT NULL COMMENT '角色名' , `desc ` VARCHAR (50 ) DEFAULT NULL COMMENT '描述' , `role_name` VARCHAR (20 ) DEFAULT NULL COMMENT '角色显示名' , PRIMARY KEY (`id`) ) ENGINE = INNODB AUTO_INCREMENT = 1 DEFAULT CHARSET = utf8 COMMENT = '角色表' ; INSERT INTO shirodb.role (name, `desc `, role_name) VALUES ('admin' , '所有权限' , '管理员' );INSERT INTO shirodb.role (name, `desc `, role_name) VALUES ('user_manager' , '用户管理员权限' , '用户管理员' );CREATE TABLE `role_user_mapping`( `id` BIGINT (20 ) NOT NULL AUTO_INCREMENT COMMENT '编号' , `uid` BIGINT (20 ) DEFAULT NULL COMMENT '用户id' , `rid` BIGINT (20 ) DEFAULT NULL COMMENT '角色id' , PRIMARY KEY (`id`) ) ENGINE = INNODB AUTO_INCREMENT = 1 DEFAULT CHARSET = utf8 COMMENT = '角色用户映射表' ; INSERT INTO shirodb.role_user_mapping (uid, rid)VALUES (1 , 1 );INSERT INTO shirodb.role_user_mapping (uid, rid)VALUES (1 , 2 );INSERT INTO shirodb.role_user_mapping (uid, rid)VALUES (2 , 2 );
新增角色以及角色用户映射实体类和dao层 1 2 3 4 5 6 7 8 9 10 11 12 13 14 15 16 17 18 19 20 21 22 23 24 25 26 27 28 29 30 31 32 33 34 35 36 37 38 39 40 41 42 @Getter @Setter @ToString @RequiredArgsConstructor @AllArgsConstructor @Entity(name = "role") public class Role { @Id @GeneratedValue(strategy = GenerationType.IDENTITY) private Integer id; private String name; private String desc; private String roleName; } @Getter @Setter @ToString @RequiredArgsConstructor @AllArgsConstructor @Entity(name = "role_user_mapping") public class RoleUserMapping { @Id @GeneratedValue(strategy = GenerationType.IDENTITY) Integer id; Integer uid; Integer rid; } @Repository public interface RoleRepository extends JpaRepository <Role, Integer> { List<Role> findRolesByIdIn (List<Integer> ids) ; } @Repository public interface RoleUserMappingRepository extends JpaRepository <RoleUserMapping, Integer> { List<RoleUserMapping> findRoleUserMappingsByUid (Integer uid) ; }
修改CustomRealm 1 2 3 4 5 6 7 8 9 10 11 12 13 14 15 16 17 18 19 20 21 22 @Override protected AuthorizationInfo doGetAuthorizationInfo (PrincipalCollection principals) { logger.info("进入自定义授权方法" ); String username = principals.getPrimaryPrincipal().toString(); User user = userService.getUserByName(username); List<RoleMapping> roleMappings = roleMappingRepository.findRoleMappingsByUid(user.getId()); List<Integer> roleIds = roleMappings.stream() .map(RoleMapping::getRid) .collect(Collectors.toList()); List<Role> roles = roleRepository.findRolesByIdIn(roleIds); List<String> roleNames = roles.stream() .map(Role::getName) .collect(Collectors.toList()); logger.info("current user's roles:{}" , roleNames); SimpleAuthorizationInfo info = new SimpleAuthorizationInfo (); info.addRoles(roleNames); return info; }
测试 访问http://localhost:8080/user/userLoginRoles,看控制台日志
1 2 3 2022-10-29 16:11:11.725 INFO 27675 --- [nio-8080-exec-6] com.monochrome.shiro.realm.CustomRealm : 进入自定义授权方法 2022-10-29 16:11:11.874 INFO 27675 --- [nio-8080-exec-6] com.monochrome.shiro.realm.CustomRealm : current user's roles:[admin, user_manager] 2022-10-29 16:11:11.875 INFO 27675 --- [nio-8080-exec-6] c.m.shiro.controller.UserController : 登录认证验证角色
授权验证-获取权限进行验证 新增库表及实体类 1 2 3 4 5 6 7 8 9 10 11 12 13 14 15 16 17 18 19 20 21 22 23 24 25 26 CREATE TABLE permission( `id` BIGINT (20 ) NOT NULL AUTO_INCREMENT COMMENT '编号' , `name` VARCHAR (30 ) DEFAULT NULL COMMENT '权限名' , `info` VARCHAR (30 ) DEFAULT NULL COMMENT '权限信息' , `desc ` VARCHAR (50 ) DEFAULT NULL COMMENT '描述' , PRIMARY KEY (`id`) ) ENGINE = INNODB AUTO_INCREMENT = 1 DEFAULT CHARSET = utf8 COMMENT = '权限表' ; INSERT INTO shirodb.permission (name, info, `desc `) VALUES ('删除用户' , 'user:delete' , '删除用户' );INSERT INTO shirodb.permission (name, info, `desc `) VALUES ('新增用户' , 'user:add' , '新增用户' );INSERT INTO shirodb.permission (name, info, `desc `) VALUES ('修改用户' , 'user:edit' , '修改用户' );CREATE TABLE `role_permission_mapping`( `id` BIGINT (20 ) NOT NULL AUTO_INCREMENT COMMENT '编号' , `rid` BIGINT (20 ) DEFAULT NULL COMMENT '角色id' , `pid` BIGINT (20 ) DEFAULT NULL COMMENT '权限id' , PRIMARY KEY (`id`) ) ENGINE = INNODB AUTO_INCREMENT = 1 DEFAULT CHARSET = utf8 COMMENT = '角色权限映射表' ; INSERT INTO shirodb.role_permission_mapping (rid, pid) VALUES (1 , 1 );INSERT INTO shirodb.role_permission_mapping (rid, pid) VALUES (1 , 2 );INSERT INTO shirodb.role_permission_mapping (rid, pid) VALUES (1 , 3 );
1 2 3 4 5 6 7 8 9 10 11 12 13 14 15 16 17 18 19 20 21 22 23 24 25 26 27 28 29 30 @Getter @Setter @ToString @RequiredArgsConstructor @AllArgsConstructor @Entity(name = "permission") public class Permission { @Id @GeneratedValue(strategy = GenerationType.IDENTITY) private Integer id; private String name; private String info; private String desc; } @Getter @Setter @ToString @RequiredArgsConstructor @AllArgsConstructor @Entity(name = "role_permission_mapping") public class RolePermissionMapping { @Id @GeneratedValue(strategy = GenerationType.IDENTITY) Integer id; Integer pid; Integer rid; }
新增dao层,查询权限 这次为了方便,采用自定义SQL语句,一次就通过role、role_permission_mapping两张表查询出权限
1 2 3 4 5 public interface PermissionRepository extends JpaRepository <Permission, Integer> { @Query("select p from #{#entityName} p, role_permission_mapping rp where p.id = rp.pid and rp.rid in ?1") List<Permission> findPermissionsByRids (List<Integer> rids) ; }
修改CustomReam,查询权限
1 2 3 4 5 6 7 8 9 10 11 12 13 14 15 16 17 18 19 20 21 22 23 24 25 26 27 28 29 @Override protected AuthorizationInfo doGetAuthorizationInfo (PrincipalCollection principals) { logger.info("进入自定义授权方法" ); String username = principals.getPrimaryPrincipal().toString(); User user = userService.getUserByName(username); List<RoleUserMapping> roleUserMappings = roleUserMappingRepository.findRoleUserMappingsByUid(user.getId()); List<Integer> roleIds = roleUserMappings.stream() .map(RoleUserMapping::getRid) .collect(Collectors.toList()); List<Role> roles = roleRepository.findRolesByIdIn(roleIds); List<String> roleNames = roles.stream() .map(Role::getName) .collect(Collectors.toList()); logger.info("current user's roles:{}" , roleNames); List<Permission> permissions = permissionRepository.findPermissionsByRids(roleIds); List<String> permissionInfos = permissions.stream() .map(Permission::getInfo) .collect(Collectors.toList()); logger.info("current user's permissions:{}" , permissionInfos); SimpleAuthorizationInfo info = new SimpleAuthorizationInfo (); info.addRoles(roleNames); info.addStringPermissions(permissionInfos); return info; }
新增Controller层
1 2 3 4 5 6 7 8 @RequiresPermissions("user:delete") @GetMapping("userLoginPermissions") @ResponseBody public String userLoginPermissions () { logger.info("登录认证验证权限" ); return "验证权限成功" ; }
测试 访问http://localhost:8080/user/userLoginPermissions,看控制台日志
1 2 3 4 5 6 7 8 com.monochrome.shiro.realm.CustomRealm : 进入自定义授权方法 Hibernate: select user0_.id as id1_4_, user0_.name as name2_4_, user0_.pwd as pwd3_4_, user0_.rid as rid4_4_ from user user0_ where user0_.name=? Hibernate: select roleuserma0_.id as id1_3_, roleuserma0_.rid as rid2_3_, roleuserma0_.uid as uid3_3_ from role_user_mapping roleuserma0_ where roleuserma0_.uid=? Hibernate: select role0_.id as id1_1_, role0_.desc as desc2_1_, role0_.name as name3_1_, role0_.role_name as role_nam4_1_ from role role0_ where role0_.id in (? , ?) com.monochrome.shiro.realm.CustomRealm : current user's roles:[admin, user_manager] Hibernate: select permission0_.id as id1_0_, permission0_.desc as desc2_0_, permission0_.info as info3_0_, permission0_.name as name4_0_ from permission permission0_ cross join role_permission_mapping rolepermis1_ where permission0_.id=rolepermis1_.pid and (rolepermis1_.rid in (? , ?)) com.monochrome.shiro.realm.CustomRealm : current user's permissions:[user:delete, user:add, user:edit] c.m.shiro.controller.UserController : 登录认证验证权限
实现缓存 缓存工具EhCache EhCache是一种广泛使用的开源Java分布式缓存。主要面向通用缓存,Java EE和轻量级容器。可以和大部分Java项目无缝整合,例如:Hibernate中的缓存就是基于EhCache实现的。
EhCache支持内存和磁盘存储,默认存储在内存中,如内存不够时把缓存数据同步到磁盘中。EhCache支持基于Filter的Cache实现,也支持Gzip压缩算法。
EhCache直接在JVM虚拟机中缓存,速度快,效率高;
EhCache缺点是缓存共享麻烦,集群分布式应用使用不方便
EhCache搭建使用
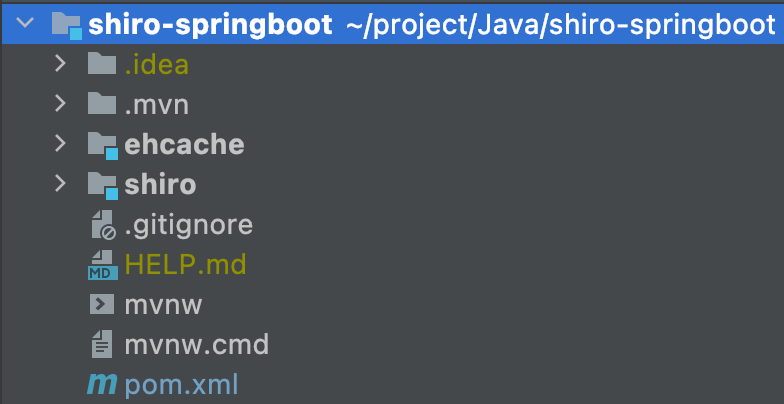
创建模块
在shir-springboot的模块下新建子模块shiro、ehcache,将原来的父模块的shiro相关代码移到新建的shiro模块下
父pom:
1 2 3 4 5 6 7 8 9 10 11 12 13 14 15 16 17 18 19 20 21 22 23 24 25 26 27 28 29 30 31 32 33 34 35 <?xml version="1.0" encoding="UTF-8" ?> <project xmlns ="http://maven.apache.org/POM/4.0.0" xmlns:xsi ="http://www.w3.org/2001/XMLSchema-instance" xsi:schemaLocation ="http://maven.apache.org/POM/4.0.0 https://maven.apache.org/xsd/maven-4.0.0.xsd" > <modelVersion > 4.0.0</modelVersion > <parent > <groupId > org.springframework.boot</groupId > <artifactId > spring-boot-starter-parent</artifactId > <version > 2.7.4</version > <relativePath /> </parent > <groupId > com.monochrome</groupId > <artifactId > shiro-springboot</artifactId > <version > 0.0.1-SNAPSHOT</version > <name > shiro-springboot</name > <description > shiro-springboot</description > <packaging > pom</packaging > <properties > <java.version > 11</java.version > </properties > <modules > <module > shiro</module > <module > ehcache</module > </modules > <build > <plugins > <plugin > <groupId > org.springframework.boot</groupId > <artifactId > spring-boot-maven-plugin</artifactId > </plugin > </plugins > </build > </project >
shiro模块pom:
1 2 3 4 5 6 7 8 9 10 11 12 13 14 15 16 17 18 19 20 21 22 23 24 25 26 27 28 29 30 31 32 33 34 35 36 37 38 39 40 41 42 43 44 45 46 47 48 49 50 51 52 53 54 55 56 57 58 59 60 61 62 63 64 65 66 67 <?xml version="1.0" encoding="UTF-8" ?> <project xmlns ="http://maven.apache.org/POM/4.0.0" xmlns:xsi ="http://www.w3.org/2001/XMLSchema-instance" xsi:schemaLocation ="http://maven.apache.org/POM/4.0.0 http://maven.apache.org/xsd/maven-4.0.0.xsd" > <parent > <groupId > org.springframework.boot</groupId > <artifactId > spring-boot-starter-parent</artifactId > <version > 2.7.4</version > <relativePath /> </parent > <modelVersion > 4.0.0</modelVersion > <artifactId > shiro</artifactId > <properties > <java.version > 11</java.version > </properties > <dependencies > <dependency > <groupId > org.springframework.boot</groupId > <artifactId > spring-boot-starter-data-jpa</artifactId > </dependency > <dependency > <groupId > org.springframework.boot</groupId > <artifactId > spring-boot-starter-web</artifactId > </dependency > <dependency > <groupId > mysql</groupId > <artifactId > mysql-connector-java</artifactId > <scope > runtime</scope > </dependency > <dependency > <groupId > org.apache.shiro</groupId > <artifactId > shiro-spring-boot-web-starter</artifactId > <version > 1.9.1</version > </dependency > <dependency > <groupId > org.springframework.boot</groupId > <artifactId > spring-boot-starter-thymeleaf</artifactId > </dependency > <dependency > <groupId > org.projectlombok</groupId > <artifactId > lombok</artifactId > </dependency > <dependency > <groupId > org.springframework.boot</groupId > <artifactId > spring-boot-devtools</artifactId > <scope > runtime</scope > <optional > true</optional > </dependency > <dependency > <groupId > org.springframework.boot</groupId > <artifactId > spring-boot-starter-test</artifactId > <scope > test</scope > </dependency > </dependencies > <build > <plugins > <plugin > <groupId > org.springframework.boot</groupId > <artifactId > spring-boot-maven-plugin</artifactId > </plugin > </plugins > </build > </project >
ehcache模块添加依赖
1 2 3 4 5 6 7 8 9 10 11 12 13 14 15 16 17 18 19 20 21 22 23 24 25 26 27 28 <?xml version="1.0" encoding="UTF-8" ?> <project xmlns ="http://maven.apache.org/POM/4.0.0" xmlns:xsi ="http://www.w3.org/2001/XMLSchema-instance" xsi:schemaLocation ="http://maven.apache.org/POM/4.0.0 http://maven.apache.org/xsd/maven-4.0.0.xsd" > <modelVersion > 4.0.0</modelVersion > <groupId > com.monochrome</groupId > <artifactId > ehcache</artifactId > <version > 0.0.1-SNAPSHOT</version > <name > ehcache</name > <properties > <maven.compiler.source > 11</maven.compiler.source > <maven.compiler.target > 11</maven.compiler.target > </properties > <dependencies > <dependency > <groupId > net.sf.ehcache</groupId > <artifactId > ehcache</artifactId > <version > 2.10.9.2</version > </dependency > <dependency > <groupId > org.junit.jupiter</groupId > <artifactId > junit-jupiter</artifactId > <version > RELEASE</version > <scope > test</scope > </dependency > </dependencies > </project >
在resources目录下添加配置文件ehcache.xml
1 2 3 4 5 6 7 8 9 10 11 12 13 14 15 16 17 18 19 20 21 22 23 24 25 26 27 28 29 30 31 32 33 34 35 36 37 38 39 40 41 42 43 44 45 <?xml version="1.0.0" encoding="UTF-8" ?> <ehcache > <diskStore path ="java.io.tmpdir/ehcache" /> <defaultCache maxEntriesLocalHeap ="10000" eternal ="false" timeToIdleSeconds ="120" timeToLiveSeconds ="120" maxEntriesLocalDisk ="10000000" diskExpiryThreadIntervalSeconds ="120" memoryStoreEvictionPolicy ="LRU" > <persistence strategy ="localTempSwap" /> </defaultCache > <cache name ="HelloWorldCache" maxElementsInMemory ="1000" eternal ="false" timeToIdleSeconds ="5" timeToLiveSeconds ="5" overflowToDisk ="false" memoryStoreEvictionPolicy ="LRU" /> </ehcache >
创建测试类,操作缓存
1 2 3 4 5 6 7 8 9 10 11 12 13 14 15 public class EhCacheTest { @Test public void test () { InputStream input = this .getClass().getResourceAsStream("/ehcache.xml" ); CacheManager cacheManager = new CacheManager (input); Cache cache = cacheManager.getCache("HelloWorldCache" ); Element element = new Element ("name" ,"zhang3" ); cache.put(element); Element element1 = cache.get("name" ); System.out.println(element1.getObjectValue()); } }
shiro整合ehcache Shiro官方提供了shiro-ehcache,实现了整合EhCache作为Shiro的缓存工具。可以缓存认证执行的Realm方法,减少对数据库的访问,提高认证效率
在shiro模块下添加依赖 1 2 3 4 5 6 7 8 9 10 <dependency > <groupId > org.apache.shiro</groupId > <artifactId > shiro-ehcache</artifactId > <version > 1.10.0</version > </dependency > <dependency > <groupId > commons-io</groupId > <artifactId > commons-io</artifactId > <version > 2.7</version > </dependency >
在 resources 下添加配置文件 ehcache/ehcache-shiro.xml 1 2 3 4 5 6 7 8 9 10 11 12 13 14 15 16 17 18 19 20 21 <?xml version="1.0" encoding="UTF-8" ?> <ehcache name ="ehcache" updateCheck ="false" > <diskStore path ="java.io.tmpdir" /> <defaultCache maxEntriesLocalHeap ="1000" eternal ="false" timeToIdleSeconds ="3600" timeToLiveSeconds ="3600" overflowToDisk ="false" > </defaultCache > <cache name =" loginRolePsCache" maxEntriesLocalHeap ="2000" eternal ="false" timeToIdleSeconds ="600" timeToLiveSeconds ="0" overflowToDisk ="false" statistics ="true" /> </ehcache >
修改配置类 ShiroConfig,添加ehcache 1 2 3 4 5 6 7 8 9 10 11 12 13 14 15 16 17 18 19 20 21 22 23 24 25 26 27 28 29 30 31 32 33 34 35 36 37 38 39 40 41 42 public EhCacheManager getEhCacheManager () { EhCacheManager ehCacheManager = new EhCacheManager (); InputStream is = null ; try { is = ResourceUtils.getInputStreamForPath("classpath:ehcache/ehcache-shiro.xml" ); } catch (IOException e) { e.printStackTrace(); } CacheManager cacheManager = new CacheManager (is); ehCacheManager.setCacheManager(cacheManager); return ehCacheManager; } @Bean public DefaultWebSecurityManager defaultWebSecurityManager () { DefaultWebSecurityManager defaultWebSecurityManager = new DefaultWebSecurityManager (); ModularRealmAuthenticator modularRealmAuthenticator = new ModularRealmAuthenticator (); modularRealmAuthenticator.setAuthenticationStrategy(new AtLeastOneSuccessfulStrategy ()); defaultWebSecurityManager.setAuthenticator(modularRealmAuthenticator); List<Realm> realms = new ArrayList <>(); HashedCredentialsMatcher matcher = new HashedCredentialsMatcher (); matcher.setHashAlgorithmName("md5" ); matcher.setHashIterations(3 ); realm.setCredentialsMatcher(matcher); realms.add(realm); defaultWebSecurityManager.setRealms(realms); defaultWebSecurityManager.setRememberMeManager(createRememberMeManager()); defaultWebSecurityManager.setCacheManager(getEhCacheManager()); return defaultWebSecurityManager; }
测试 访问http://localhost:8080/user/userLoginPermissions,再刷新,看控制台日志,发现第二次查询权限时并未访问数据库。
1 2 3 4 5 6 7 8 9 com.monochrome.shiro.realm.CustomRealm : 进入自定义授权方法 Hibernate: select user0_.id as id1_4_, user0_.name as name2_4_, user0_.pwd as pwd3_4_, user0_.rid as rid4_4_ from user user0_ where user0_.name=? Hibernate: select roleuserma0_.id as id1_3_, roleuserma0_.rid as rid2_3_, roleuserma0_.uid as uid3_3_ from role_user_mapping roleuserma0_ where roleuserma0_.uid=? Hibernate: select role0_.id as id1_1_, role0_.desc as desc2_1_, role0_.name as name3_1_, role0_.role_name as role_nam4_1_ from role role0_ where role0_.id in (? , ?) com.monochrome.shiro.realm.CustomRealm : current user's roles:[admin, user_manager] Hibernate: select permission0_.id as id1_0_, permission0_.desc as desc2_0_, permission0_.info as info3_0_, permission0_.name as name4_0_ from permission permission0_ cross join role_permission_mapping rolepermis1_ where permission0_.id=rolepermis1_.pid and (rolepermis1_.rid in (? , ?)) com.monochrome.shiro.realm.CustomRealm : current user's permissions:[user:delete, user:add, user:edit] c.m.shiro.controller.UserController : 登录认证验证权限 c.m.shiro.controller.UserController : 登录认证验证权限